Knghitrider LED circuit with arduino
I think it is a best way to start Arduino with this simple project. You can learn fundamentals of Arduino by doing this. Also, it's attractive project for the world famous Knight Rider tv series lovers.(KITT lovers).
This setup section runs once and it will Configure your LEDs positions to the Arduino controller
Watch this demo video before start - Video DEMO on YouTube
Ready to build!!!
You need some basic devices for this project.
- Arduino UNO with USB connector (or Nano also compatible.)
- 7 x jumper wires
- 6 x LEDs (You can add more after understanding the concept)
- Breadboard(A.K.A project board)
- Computer or a smart device with Arduino IDE(Download IDE from here.)
So lets get start!!!
First of all you have to connect your LEDs to Arduino board through the breadboard.
You can follow this sketch to do it.
***Note***
You have to concern this when connecting LEDs.
Refer this image to understand the anode and cathode of a LED.
You must connect all cathode sides of LEDs to GND pin in Arduino board(yellow wire on sketch). Each individual cathode sides are connect to Arduino pins 1 to 6.
Then connect via USB into your computer and start coding!!!
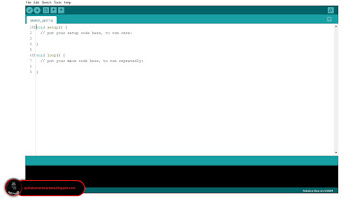
Open the Arduino IDE.
You have to initialize the pins you connected with LEDs. You can do it in void setup() section(function).
Now you have to imagine that Knight Rider pattern in your mind. It will help you to build your code.
Look carefully, there is a row of LEDs. Try to understand the blinking pattern of LEDs. Always it starts from a corner and ends from the other corner. So this is a corner to corner pattern.
So, we have to choose one corner first. Lets choose left corner first. The first left corner LED is lighting, after that it stay on lighting position on some time and then turns off. Also look the second LED on left corner. It is lighting at the same time the first LED turns off. This process repeats from left corner to right corner. After reaching the right corner. The previous pattern is going right corner to left corner. watch carefully and try to understand this pattern.
Now you have an idea for how to control your LEDs. It's the same way. You have to turn on and turn off LEDs from left to right and right to left repeatedly.
So you have to use void loop() section(function) in your code because the code you write inside loop section runs over and over again forever.
Code to the left first LED -
The LED is on and keep on for 100milliseconds and it turns off. This is the basic code block for the whole process.
When the first LED turns off, second LED needs to turn on at that same time.
Look at the code, the same code block is repeating. You can copy paste that code block and edit pin numbers.
There is nothing much to do. continue the code from the same code block from right to left.
Now upload the code to your Arduino board.
Step 1 - Save the code.
Save your code on your computer by pressing ctrl+s and choose a location.
Step 2 - Select your Arduino board model.
tools>Board:>Arduino AVR boards>....
tools>port>....
You completed the project Knightrider.


Comments
Post a Comment